Showing posts with label beauty. Show all posts

Wednesday, November 21, 2012

Neutral Eye Makeup Tutorial

Hi hi! 

I'm so sorry for the lack of post, I'm super busy with school and friends and everything! More about that in a chatty post maybe! Haha.

Alright, so today, I thought I'd show you guys how to create a neutral everyday eye look. It's very simple, not dark at all, so it's definitely a day time look. It's very soft and matte, except for a little pop of shimmer on the lower lash line! But, you'll see!


Here's a list of the products I use in this tutorial:
-Urban Decay Eyeshadow Primer Potion
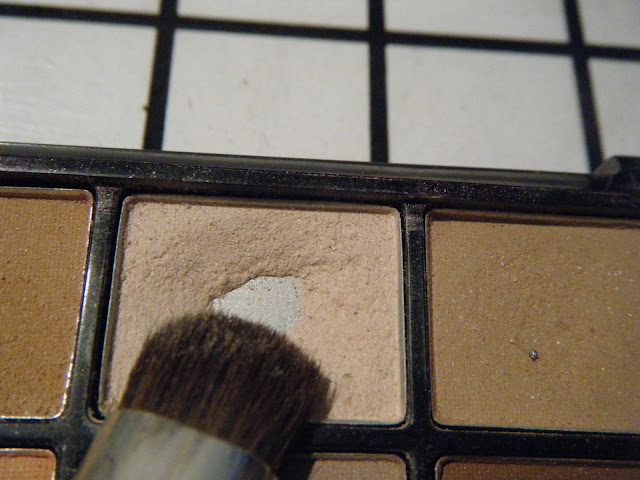
-E.L.F Endless Eyes Pro Eyeshadow Palette (only $10 for 100 eyeshadows!)
-Maybelline Master Precise Liquid Eye Liner in Black
-Wet n' Wild Coloricon Shimmer Eye Pencil in Copper
-L'Oréal Voluminous Million Lashes Mascara
-Lancôme Hypnôse Star Mascara (Sample Size)

S T E P   O N E
Apply eyeshadow primer to your lids to make your shadow last throughout your busy day!


S T E P   T W O
Apply a light beige color to your entire eyelid to even out any veins or redness that might show on your lids.


S T E P   T H R E E
Run a soft brown color through your crease for more depth and dimension.

Sorry, the lighting washed out most of the color..


S T E P   F O U R
Focusing on the outer corner of the lids, add a deeper brown a softly blend it into the crease.


S T E P   F I V E
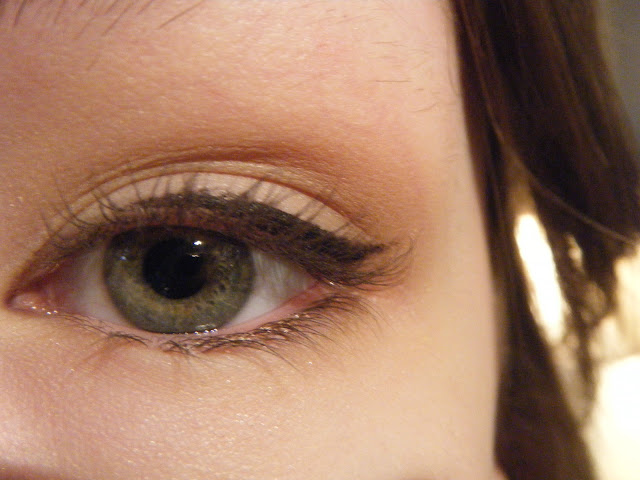
Apply a thin line of black liquid liner and wing it out, but not too much. Keep it simple.


Oops, bad lighting..but shh! Haha


S T E P   S I X
Add a shimmery bronze color to your lower lash line.


S T E P   S E V E N
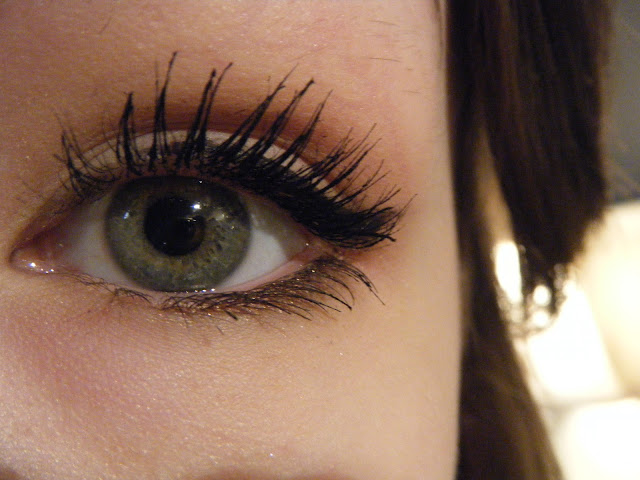
Mascaraaa!! I really like layering my mascara to get the most out of my lashes. Right now, I'm more into volume than length, so the two mascaras I've been using together are the perfect combo! 

As you can see, I looove my L'Oréal mascara..the packaging has definitely seen better days, but it's the inside that counts ;)! Haha.

Aalllrighty, that's it! But, for the lips, I recommend a tinted lip balm like the L'Oréal Color Riche Balm, The Maybelline Baby Lips, or, like the one I used in the picture below, the Nivea tinted lip balm (in fruity shine).


T H E   F I N A L   L O O K


I hope you liked this tutorial and let me know if you have any tutorial requests. I really like doing these step-by-step ones because the process is very fun for me! :) 

I know I've been absent the past few weeks, and I can't promise anything, but I'll try my best to post more often!!

Thanks to everyone who reads, comments, and follows! Love you aaaaaallll ^^!

xox, myr <3

Sunday, November 11, 2012

"A Little Bit Of Everything" Haul

Heeey, I'm baaack!!

I'm so sorry about the past few weeks..I wasn't posting as much "fun" stuff as usual because of some problems I had and had to deal with some things, but I'm allllll better now and ready to get back on track with my blog!

I've missed posting on here and so I felt like a nice collective haul would be perfect! Haha

I have 2 thrifted pieces, some [amaaazing] jeans that weren't thrifted, makeup, a new phone, and a nail polish! I obviously didn't buy all of this at once, but I decided to wait until I got more stuff to post one big haul! Anyways, I'll get started now!

**All prices are in CANADIAN DOLLARS**


T H R I F T E D

$2.99

I looove this shirt! I don't wear it buttoned up because my chest area is too big..i'm not saying I have big breasts, at all! just thant it's a size extra small and I'm usually a small! Hahaha!

$1.99

This shirt was brand new! It had the tag on it and the size sticker! I LOVE superheros if you didn't know that already, I'm kiiind of nerdy, so I was amazed when I saw this!!

A M E R I C A N    E A G L E

On sale for $29.99 (used to be $59.99!!)

I'm in looove with these!! They have that "wet" or leathery look to them, but in reality they're just shiny. They're amazing and hugs your legs and booty soo well!! Haha, that might have been tmi, but you know what I mean!


P H O N E


Yaaay!!!!! IPhone 4S!! Haha, I'm not gonna say how much I paid because I had to upgrade from my [crappy] blackberry, and that was kiiind of expensive, but I paid myself, so it's not like I'm suuuper spoiled and that my parents paid for it or anything! Buut I'm soooo happy I upgraded! Iphones are waaaay better than blackberries!! JS! I also got a shiny pink case, cuz..you know! It was pink and sparkly, and I can't resist pink and sparkly things! Gaaah!

M A K E U P / B E A U T Y / N A I L S


$8.89

I never really got into the "fill in your eyebrows" look, but lately I've been wanting to try it! I just bought this today so I'm not sure if I like it, but if I do I'll surely include it in my November favorites or maybe a review. 

 
$1.99

Again, I bought this for my brows, but I tried it and it's too dark, so I might just use it for eyeliner. And even if I don't like it for that purpose, it was only $1.99 so I don't really care.

 
$1.99

I LOOOOOOVE THIS!! I bought it because I always wear a bronzy color on my lower lashline, but I used to use eyeshadows, so I figured I would try this when I saw it. And it's great!! The texture is not the absolute best, but for $1.99, I'd say it's amazing!! And it's pretty pigmented!

I'm not sure how much I spent on this but it was not more than $9.00

I actually don't recommend this, it smudges throughout the day, so if you want a nice gel liner, I'd recommend splurging to get one with longer lasting powers!

Swatches of the eyeliners:
(From top to bottom) : Maybelline Gel Liner, Wet N' Wild Coloricon eyeliner in Copper, NYC Kohl eye and brow liner in Taupe

(Instagram photo..[my username is myrbear], you should follow me! ;) haha!)

$8.99

Alright, so I thought these were only sold in the United States, buuut, I found them at my local drugstore and I HAD to get it!! It was the only one left, so I got really lucky! They all smell sooo nice but my favorite is the vanilla one! Soooo good!

 
$9.99

This is a really nice blood red color if you apply 1 coat, but it's buildable to an oxblood type of color! GO BUY IT RIGHT NOW IT'S AMAZING!!!!


Aaaalright! I'm done now! Haha! Apart from the Maybelline eyeliner, I recommend everything included in this haul! Well, for the thrifted things, I recommend you go thrifting! Hahaha!

I hope you enjoyed this post, and I promise I'll post more!!!

Thanks for reading/following/commenting! Keep the love coming! <33

xox, myr <3 ^^

Sunday, October 14, 2012

DIY: Lip Scrub

Happy Sunday everyone! 
Or Monday if you only see this tomorrow, or happy whatever day it is when you read this! Hhaha.


For this post, I decided to do something more creative and something that would be fun. Sooo, I decided to share with you guys my own recipe of lip scrub :)

Last year, I really wanted to buy lip scrub off of the Lush website since I don't have a Lush store near me. But the shipping was pretty expensive so I didn't feel like spending $20 for lip scrub. Instead, I read what the ingredients were: Sugar, vanilla extract, flavor, and some things I knew I wouldn't find anywhere where I live. So I just improvised and it worked! I promise it is really simple and you probably have all the ingredients already in your bathroom and kitchen!

I first made this last Spring season, so it was getting gross and the vanilla had completely separated itself from the other ingredients. Since it was so gross, I decided to make a new one and show you guys how to make it.

So let's get started! 

W H A T  Y O U ' L L  N E E D  :

-Vanilla Extract (1/2 -1 tsp.)
-Vaseline (2 tsp.)
-Brown Sugar (2-3 tbsp.)
-An Empty Pot or Container (Cleaned)
-A Bowl (to mix everything in)
-A Fork
-A Tablespoon
-A Teaspoon

Optional:
-Flavor (I used 2 tsp. of french vanilla capuccino powder)

**FUN FACT:
 This is edible!! The Vaseline will stay on your lips so you'll only lick the sugar off :)


S T E P  O N E

Put 2 teaspoons of Vaseline in a bowl.

S T E P  T W O

Start by adding half a teaspoon of vanilla extract to the Vaseline. If you need more later on when you've mixed everything, you can add another half teaspoon of it, but just in case, start with only one half of a teaspoon.

S T E P  T H R E E

Adding only one tablespoon of brown sugar at the time, mix everything well with a fork. Don't add the three tablespoons at once, it may be harder to mix together. 

After adding one tablespoon of brown sugar to half a teaspoon of vanilla extract and one teaspoon of Vaseline. (I had only put 1 tsp. of Vaseline at first because I didn't know for sure how much to put in but you definitely need 2!)

S T E P  F O U R 
( o p t i o n a l )

Add 2 teaspoons of flavor. Again, I am using some french vanilla cappuccino powder but you could skip this step. The first time I tried this lip scrub, I only put vanilla extract and sugar and it tasted fine, but if you want yours to be a bit more tasty, I really recommend using some sort of flavored coffee/cappuccino powder. You could also try a small amount of crystal light powder if you don't like the taste of coffee. I really like it more with coffee powder!!


S T E P  F I V E


Mix everything together and make sure the vanilla extract is 100% blended into the mixture! Then, with the teaspoon or with the fork, transfer the mixture from the mixing bowl to the empty container or pot. (I used an empty pot of primer I used up.)


In case you don't know how to apply this, here are some

D I R E C T I O N S :

With your finger, apply a small amount of lip scrub to the lips. Make sure you scrub it evenly on the lips with your finger. Once the mixture is evenly distributed to both lips, rub your lips together to remove all the dead skin of yours dried/chapped lips. (You can even use this if you don't have chapped lips just to make lipstick go on more evenly and smoothly.) Then, lick it off. Like I said in the beginning , the Vaseline will stay on your lips so you don't have to worry about eating Vaseline! That would be kind of gross wouldn't it? Hahah! I promise you will only taste the sugar, vanilla extract and coffee (if applicable).

Alrighty, that's all for today!

I hope you enjoyed this very simple lip scrub recipe! I've been using this for 6 months now and it makes such a difference to your lips! It's amazing! Plus, you probably already had all these ingredients so for most people, it's completely free! So if for any reason you don't like it, at least you didn't spend money on it!

As always, thanks to everyone who reads/comment/follow!! I love every single one of you sososo much!!

xox, myr <3

Wednesday, October 10, 2012

My New Mascara Routine

Hello pretties :)

Today I thought I would go ahead and show you my new mascara routine. I've only been doing this for the past 2 weeks, but I'm already in love with it and I would very much recommend it to every girl in the world!!

First, let me tell you what mascaras I use for this look:


Maybelline New York The Falsies (Waterproof) and The Colossal Cat Eye Mascaras

First off, I want to talk a bit about these 2 mascaras. 

T H E  F A L S I E S
I really like this mascara and have loved it for about 3 years now (I don't use the same one I did 3 years ago, don't worry! Haha). But I find that I only like it when it's a bit dried out. Not too dried, but just enough so that it's not too liquid-y and tacky on the lashes. I feel like when I first buy it, I always get disappointed with how it looks and feels on my lashes. What I do is give it 1-2 months and then try it again, and every time I re-fall in love with it all over again! Haha. If anyone in the world hasn't tried this mascara yet..well I don't know how you ever survived! Haha, go out there and get it!!

T H E  C O L O S S A L  C A T  E Y E S
I only got this 2 weeks ago, but it's already my new favorite mascara of all times!! I'm in loooove!!! I might do a review on this when I have the time to write a long post (right now I don't..I have t oleave in 15 minutes! hahaha) so keep your eyes peeled for that :)

B E F O R E


Anyways, now that I've babbled and lost a lot of time, I'll get right into the (very few) steps :)

S T E P  O N E
Apply one coat of The Falsies to your lashes 

S T E P  T W O
Apply 1-2 coats of The Colossal Cat Eyes to your lashes without letting The Falsies dry.
(I only realised after uploading the pictures that I had a huge clump on the top of that super long lash! Haha, sorry about that, I was in a hurry!)

S T E P  T H R E E
Apply a very thin coat of The Falsies to the bottom lashes. I hate it when people wear a ton of mascara on the bottom lashes, so I keep it minimal and natural looking :)

A F T E R
Your lashes may or may not look like this after these three easy steps :) 
(grr, so blurry!!)


Alrighty, I hope you guys enjoyed this very quick blog post!! Please note that if I made any spelling errors or anything, it's because I am in a complete rush! In fact, I don't really have time to explain why! 

So thank so much for following/reading/commenting and I love each and every one of you so so so much!! Thanks for everything!!


xox, myr <3

Sunday, September 16, 2012

Review: NARS Blush in S-- Appeal

Hello beauty lovers :)


Today's post will be a full review of the NARS blush in the color "S-- Appeal".


This lovely product is a bit pricey. In Canada, it retails for $32.00. I know..that's a lot for blush..but in my opinion, it's worth it!

The pigmentation is just perfect..for my skin tone anyways. I can see how this product wouldn't be as visible on someone with darker skin, though. But the coverage is buildable, which is always a good thing.


It is a matte finish, which means there is no sparkles, glitter, shimmer, sheen, anything! I personally am a really big fan of this, since I like all my face makeup to be matte.

The color, however, gives your face a nice, glowy, healthy look, without the greasy look. The pinky peach color is very natural and pretty.


Like I said, this color may not be visible on girls with darker skin. Unless you pile it on, which I don't recommend! But if you have very pale skin like mine (porcelain or ivory), this color will look amazing on you!

The only 2 downsides I could think of for this product are the following:

1) The packaging can get really messy really quickly.
For example, if you apply your foundation and other face products with your fingers and you touch the packaging of these blushes after, you'll see your fingerprints all over.

2) If you pile too much on, it makes your face looks cakey.
Don't layer too much of this on your cheeks..If you're fair skinned, only 2 little swirls of this with your blush brush is enough for one cheek.

These downside don't really bother me too much, but I can see how some girls would be bothered by them. Other than that, I say this blush is perfect!

I know it's pricey, but there's a lot of product, so the chances of me actually finishing this product is very small. I think this will last me more years than it is supposed to be kept! And I really do not regret buying this! It's superb!

R a t i n g s :
Packaging: 7/10
Pigmentation: 8/10
Longevity: 8/10
Texture: 10/10
Application: 9/10

Overall Rating: 8.5/10

I hope this was helpful! I have a lot of reviews planned for this month, so look out for those.

 Also, I'm thinking of doing a nail polish collection post. Let me know if that is something you would like to see :)

Thanks so much for following/commenting/noticing me!! *virtual hugs* :)

xox, myr <3